Showing posts with label embroidery. Show all posts

Tuesday, December 3, 2013

Tis the Season

All three of my girlie-girls have gone crazy over my pencil case where I store my doodling stuff. As a Christmas gift, I made them each their own pouch, stocked it with fun pens, pencils, and markers, and found nice drawing pads. The drawing pad in the background shows off the famous Hokusai print. I bought the sketch books at Barnes and Noble for $5.99.
pocket_1

pocket_2


I will youngest daughter #3 the smaller purple notebook. She is really obsessed with writing out her name and her letters. Her notebook has lines in it. The other two girlies will get blank pages.
pocket_3


I used the same pattern as I used on my case. They turned out pretty cute I think. I love the quilting on them.
pocket_4


I love the embroidery too.
pocket_5


Here’s a size comparison for you guys. Mine is the big one. Notice that the fabric on the smaller ones looks a lot like gray wool? Notice some of it is topstitched? Hmmmm. I got my revenge on that stupid gray skirt, yes, I did. Mwaaaa haaaa haaa.
pocket_7


Here’s what I plan to put in the little pouches. Papermate should be sponsoring my buying habits.
pocket_6


I love these thick mechanical pencils. They are 1.3mm and are easy to use when I am doodling and sketching. The kids love them because they are really unbreakable.
pocket_10


I love these pens in general.
pocket_8


And these Inkjoy pens writes smooth and they come in vibrant, fun colors.
pocket_9


I think all the girls will love them. I’ll let you know.

Sunday, November 17, 2013

Long Cleansing Breath

After yesterday, I needed some easy, fun sewing. I decided I needed a pouch for all my writing supplies. I love to sketch and doodle. Don’t think like good sketching. I mostly make glorified stick people. Regardless, I always have random pencils, pens, and markers rattling around. I made a pencil pouch for them.
pouch_2


I used this Sweet Verbena tutorial to get sizes. It’s really easy, not even lined, gasp!
pouch_!


Mine is a little larger than theirs. I may have a lot pens.
pouch_4


The fabric is what’s left from this disaster yesterday. It’s cozy wool and double-layered.
pouch_5


I used Urban Threads embroidery all over this thing. I quilted it when I was done with the embroidery.
pouch_3


About those sketches . . . see? Nothing special. This is me with my pencil pouch.
pouch_6


pouch_7


I made this for my daughter. She’s the grumpy one.
pouch_8


This is typically what I draw. The little girls go wild with coloring these. I make a LOT of princesses too.
pouch_9


I made a whole series for my girlfriend of her being naked in Alaska. These crack me up.
pouch_10


The whole fam-damn-ily.
pouch_11


Hee hee!
pouch_12


Me, with the stupid gray skirt.
pouch_13


No artist here but it makes me happy. I’ve always been a doodler. Papermate should give me a cut of all their sales. I go through a lot of ink.

Saturday, September 7, 2013

Mini-Wardrobe Progress

I’m slowly working away on my mini-wardrobe. I have the Jalie knit top done. That’s an easy one. I am waiting for non-crap weather to take some photos. Here is my plan again for those interested.

I am working my way through this Burda dress. I worked out any fit issues back in July. I really liked the pattern but the fabric was not for me. Since then, I’ve been mulling over this idea to put black lace over the two inset panels. Not just lace and skin, mind you. I was thinking a patterned lace over the fashion fabric.
b_0711_110_8


This morning, I had a *facepalm* moment when I realized I could embroider black lace-ish stuff on the panel. Uh, duh. So I worked on that a while today. I’m not sure if you’ll really be able to see the “lace” all that much so maybe I should have put real lace over the panels. We’ll see. Here is the front and back of one of the panels. I used random scribble embroidery from Urban Threads that I already owned. I love their stuff so much!
b_0711_110_9b_0711_110_11


Here is the wrong side of the front. This is about as far as I got today. I should be able to finish the rest tomorrow. Maybe. Probably. This picture makes me think I should have put something high contrast on as the inset panels. Doesn’t it look kinda cool?
b_0711_110_10


Remember the Jalie 3245 raglan tops as pajamas? Well, The Ladies wanted to pose under the pictures “just like Momma does.” Look at that kid on the left, she’s got her Sassy Pose ready already and she’s only seven! I love the lace sleeve but I wish they had more stretch. You can see that the shirts are not too big!
j_3245_19


I’m hoping the weather is nice and I’ll take some photos of the Jalie knit top. I need to do a proper review and set up my mini-wardrobe review for the contest too. Are any of you people doing it too?? The pants fabric showed up today and so maybe I’ll trace those out tomorrow too. The wool coating showed up and I’m in love! I bought three yards so I can make a long coat with it.

Thursday, April 5, 2012

Aprons for Kidlets

I made aprons before using this pattern. New house = new aprons.


Me: What the hell* are you two doing?
Floral Kid: Flipping pancakes! Look at my stern-concentrate-y face!!!
Pink Kid: Testing the batter, Mom! Just like you do!
apron_2


Me: What the hell are you two doing now?
Pink Kid: Mom!!! Don’t you know the photo rules? Every time we have to pose, we get to do a Crazy Pose too!!!
Floral Kid: Ha-thum-it-ha-thum! (I think her tongue was in the way)
apron_1


I used an embroidery from Emblibrary.com. I added some bling to them because, duh, they are girls and need shiny things.
apron_3


I bought this glue the other day at JoAnn’s and I’m less than impressed. I’ve had some of the sparkles come off already. Do you guys know if those hot fix crystals stick on any better?? Does anyone know a good solution? I can see lots of sparkles in my future with three divas (four if you count me) in the house.
apron_4


Meet my new little daughter too. Isn’t she cute-a-licious??? Now I have three little princesses to sew for! This little princess got her very own princess on her apron.

Me: Smile! Smile! Look at the camera!
Smiley Cheeks: Momma, I say CHEESE!!!!!
Me: Yea, but look down here! Look at the camera!
Smiley Cheeks: I say CHEESE!!!!! CHEEEEEEEEEEEEEEEEESE!
Me: Close enough . . .
apron_6


This embroidery was a freebie from EmbroiderThis.com.
apron_5

* I NEVER swear in front of my kids (or at them for that matter). Really, I don’t. But, it’s so much fun to put into print what my brain is really saying. In reality I think I said, “What in the world are you two crazy people doing?”

Monday, January 24, 2011

Um, seriously? They’re too small??!?

My son is at that age where clothes cease to fit him in a very short period of time. I bought him several pairs of nice “school jeans” in August. Guess what? They are all too small now. They are almost all brand new and have minimal wear on them. I decided to refashion them into girl jeans. On this first pair, I ripped open the side leg seam so I could add some embroidery. It’ll be easy to sew that back up and hem them.

Is this not the cutest embroidery in the whole world? I got it free at EmbroiderThis.com. I want to make one with lace stripes and another with pink rick rack. I want to make one with pink bows on the pockets and one with flowers with button centers. I may even take off some back pockets and stitch them. Any other ideas? I’m sure Angie could do this 500 better than me. She’s so artistic and creative. Me? I’m a workhorse, I can get shite done. Creative, I am not.
decorated_jeans_1decorated_jeans_2


Here are the seven pairs of jeans that are too small. Yee-zits!!!
decorated_jeans_3


I figure this is a fast, easy, simple project that will keep my sewing blues away but yet it don’t take much space and it doesn’t take much thinking. I’m concentrating all my spidey senses on packing  and moving right now.

Oh, and guess who’s ITY came today??! It’s weird too because my first order isn’t here yet but the second one came today.

Tuesday, July 27, 2010

First project in the new house…

ETA: Some links, a correction and formatting nasty.

So.

I live in a new house. Weird how life turns out. I have a new, albeit smaller, sewing room and all my stuff moved here. As you could probably tell I took a summer sewing break to move and spend some quality time with my kiddos. They seem to be taking the move well. They love the new house.

My first sewing project is an easy one. I had several girl shirts that were booooooorrrrrrring (girls' terms, not mine). I used my handy dandy embroidery machine to add a little pop to them. All these designs are (maybe were?) free. I think I got all except the bird from Emblibrary.com EmbroiderThis.com. The bird was a freebie from UrbanThread.com. I am doing all my posts via iPhone so I can't make links and I'm sure all the formatting will be junk. When I get my Internet hooked up, I'll
reformat these posts.

I have several things to post about. I'll show you my new sewing digs. And, forgive me, but I have found the perfect RTW jeans and, GASP, bought some!!!! I'll show you those soon. I'm glad to be back!!!!!!


Sunday, May 9, 2010

Crop circles on my butt . . .

I am wanting to make another pair of Jalie jeans and am playing around with embroidery on the pockets. I plan on using the Font Engine component of Embird to make my design. Right now, I'm leaning toward the Crop Circle Dingbat font from dafont.com. I particularly like the bottom one of my samples. The others are too small and I was experimenting with stitches. Not only do I like the shapes but I would love to have some crop circle-esque on my butt. It would make me smile every time I saw it. I was thinking too that it might be fun to put some sequins or small beads in those circles.


What do you guys think??

Thursday, November 19, 2009

Let's talk embroidery, shall we?

Remember this embroidery from the other day? I have been playing around quite a bit with my embroidery machine. I love big, bold designs. I bought the Embird software quite a while back so I could place several embroideries together and make stitching faster and easier. When my girlfriend asked me to embroider her Christmas stockings the other day, I went ahead and bought the Font Engine plug-in that goes with it. I figured that I could either pay for each individual font or buy the Font Engine and convert my own fonts. My favorite font site is http://www.dafont.com/. They have oodles of nice, good, and free fonts. With Font Engine you can download any font and digitize it for an embroidery machine. While not all fonts digitize well, the ones I have tried do work very well. For each character there is an outline and a fill stitch. You can modify each of those options so you get just the look you want. I often choose to do away with the fill and use only the outline instead. For example, let's look at the designs in this picture. I omitted the fill in the three designs. On the leftmost design, I used a Bean stitch for the border. On the middle design (my favorite) I used the Redwork stitch. The bottom one is one I just messed up on. How fun would it be to have overlapping stitches, colors, and designs? With Embird software, you can do all of that.
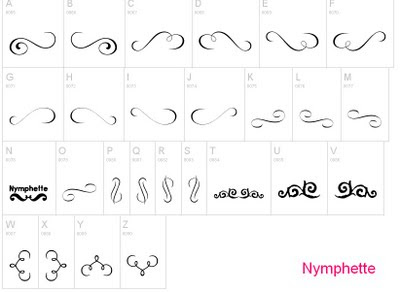
So here is where I found the loops for the above designs.


Here are some other fonts that would be fun on jean pockets.


I've used this already on a knee patch for my son.


Even this curly alphabet would be fun with big, outlined, enlarged letters. With Font Engine you can skew, slant, enlarge, and change the letters. You can make your letters up to 12" big.


And, by the way, I'm not affiliated with their business, I just really like the products. Enjoy!
ETA for Beth: All you have to do is download the font to your computer and, once in Embird, click "Insert Font", type your text, change it to your specifications, and hit okay. Then you just save it like normal. Without extensively tweaking the fonts, you could do this in a matter of minutes. I haven't played with it much but I think it would be easy to have it from font download to embroidery design in about five minutes. I 've been doing mine in about 10 minutes but that is because I'm tinkering with all the options and then looking at it in the 3D mode to see if I like it. The 3D view is a surprisingly accurate way to see if you'll like the design once it is stitched out.